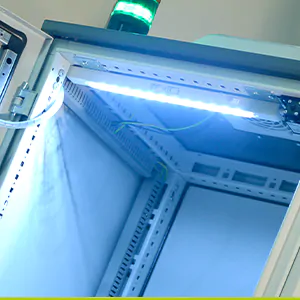
Fan Filters for Enclosure Cooling
We discuss how a fan filter unit works to facilitate enclosure cooling.
A fan filter is used to dissipate heat within an enclosure or cabinet and as a result, prevents the premature failure of the equipment inside it. The most common method is to pull the warm air out (reverse flow) near the top using a fan filter while cooler air is drawn in through a stand alone filter at the bottom of the cabinet. Both fan filter and filter provide protection to IP54 and prevent the ingress of dust and water splashes. Increased protection can be specified to IP55 if needed on most of the range. The reverse where air is pushed out of the base of the enclosure is also an option but less efficient in terms of heat dissipation.
You can view our range of Fan Filter units here.
Fan Filter Compatibility
Panel builders and machine builders across the UK manufacture electrical enclosures and cabinets to specific industry sizes. The market is highly competitive, with customers requiring short lead times and value added features. This expands beyond the enclosure itself, but also to the components within the cabinet. In the specification stages of the panel building process, industry sizes also apply to the cut outs of filter fans and ventilation exhaust units.
Axair supply a large range of filter fans designed specifically to facilitate the dissipation of heat within cabinets or enclosures. The expanding range, which Axair supply from innovative air climate control manufacturer, Fandis, consists of five sizes. All are designed to industry cut out sizes to speed up the installation process and ensure that the enclosure is kept effectively sealed to prevent the airflow being affected by unrequired gaps between the cabinet and the fan filter and thus creating a negative performance. The sealing gasket used on each of the filter fans facilitates this by ensuring an air tight fit and also eradicates the ingress of both dust and liquid within the enclosure. All Axair fan filters are fitted with G3 filter media, making the units ingress protected to IP54 as standard, with IP55 available on request by installing thicker G4 filter media.
Industry standard cut out sizes are below with their comparable fan filter unit available from Axair fans or to purchase direct via Axair Online, standard industry sizing of Axair fan filters enables customers to easily retrofit filter units from other manufacturers where pricing from Axair Online gives added value with no inconvenience of resizing electrical panels:
Industry Size Fan Filter Units:
| Standard Cut Out Size | Fan Filter Type |
| 92x92mm | FPF08 or FF08 |
| 124x124mm | FPF12 or FF12 |
| 177x177mm | FPF13 or FF13 |
| 223x223mm | FPF15 or FF15 |
| 292x292mm | FPF20 or FF20 |
Filter fans are used to provide optimum climate control within enclosures. The internal temperature within an electrical cabinet can be reduced by pushing cooler filtered outside air into the enclosure and exhausting the hot cabinet air into the atmosphere. The resulting air flow prevents the formation of localised hot spots and protects the electronic thermal management components from overheating. All Axair fan filter units are available with ball bearing AC or DC compact fans with an airflow up to 730 m3/hr in both 115v and 230v or as exhaust units minus the fan. Axair Filter fans are designed for internal use predominantly but stainless steel covers can be provided where needed.
What is the Difference Between the FF & FPF?
The re-engineered FF series of filter fans offers an innovative easy-to-mount solution that requires no tools thanks to a simple click-fit design. Due to its enhanced construction, the FF considerably reduces the risk of water infiltration and increases operational safety. We explain the key differences between the FF series and the original FPF series of filter fans below.
Click-fit Rapid Installation with Mounting Clips
Innovative new mounting clips have been added to the FF series to allow for fast, tool-free installation. No screws are needed as the filter fan unit is simply pressed into the enclosure cut out. It is designed to work with multiple panel thicknesses from 1mm to 8mm. Although the FPF series also have mounting clips, they are more limited in terms of the thickness of the panel to which they can be applied.
Easy Slide Opening
A key difference between the FF and FPF design is the sliding front cover. To replace filter media (read our guide on how often to do this), the cover of the FF can be easily slid upwards and removed by hand with no need for tools. Whereas, a screwdriver is required to take off the FPF cover. Whilst this is a small change, it will save maintenance time and reduce the risk of damage to the cover.
Improved Water Resistance
Both FF and FPF series benefit from Fandis design features, such as, slanting louvres on the filter cover to facilitate water runoff. However, the FF also has angled grooves in the seal between the base and cover to improve moisture resistance up to IP55. This can be increases to IP56 with use of a stainless steel cover.
Hidden Seal
The FF benefits from a dedicated perimeter seat that houses the seal between the filter unit and the enclosure. This has been added to improve ingress protection by allowing the filter to sit flush to the panel without letting dust settle on the seal.
The Importance of UV Protection for Filter Fans
The UV protection of a filter fan unit for an enclosure is an element that rarely factors into the purchasing decision when selecting filter fans or filter fan units. This element should not be overlooked especially if the enclosure is going to be situated outside. UV protection may seem irrelevant but without adequate protection, the shiny new unit will soon become an eyesore making it look old and outdated. UV degradation can be a huge problem. It can make the plastic crack and disintegrate causing irreparable damage. This means having to buy a new filter fan unit a lot sooner than predicted which could mean potential unscheduled downtime and an unplanned expense. Cracks from the UV degradation could also cause the rest of the equipment in the enclosure to act erratically as the performance that is expected will be skewed as the cracks will affect the airflow unexpectedly.
Our Fandis supplied filter fan units are made from PC and ABS plastic alloy. Our supplier partner, Fandis, conducted comparable UV protection on our plastic models and on leading competitors too. The UV tests were completed using samples in colour RAL 7035 for both standard FPF and FF product in addition to competitor samples. The independent in-house test results indicated that the products were much more resistant to UV exposure in comparison to competitor’s samples. The Fandis sample only started to discolour at 280h whereas the competitor samples were completely discoloured by 85 hours. Additionally, the Fandis product, supplied by Axair, displayed no cracks after the 440h test while the competitor’s product showed signs of damage and cracks after 267h.
By taking UV protection into consideration is more than a method of cosmetic damage prevention but reduces the potential problems that come with having unexpected downtime as a result of negative performance.
How Many Times Can I Wash the Filter Media in a Filter Fan Unit?
How often the filter media should be changed depends on the environment that the fan filter is being used in so check the condition regularly. The filter material can be cleaned and washed up to 10 times dependant on the operating environment. We sell standard G3 filter media (IP54) or G4 filter media (IP55) in boxes of 6 pieces. To change or replace the media in an FPF fan filter, Insert a small screwdriver into the hole at the bottom of the filter then twist to remove the cover. You can purchase replacement G3 Filter Media or G4 Filter Media Click Here.
How Do I Install a Filter Fan Unit?
Follow the mounting Instructions below for installing FPF fan filters:
1. Cut the mounting hole (where required) in the enclosure using the required dimensions.
2. Remove the louvered cover and the filter media from the base by using a screwdriver in the slots provided in the bottom edge of the cover.
3. Insert the filter into the mounting hole.
4. Clamp the elastic hooks (on the top sides and at the top by pushing at the base). In case of difficulty, lever on the elastic hooks using a screwdriver.
5. Put the filter media into the base (the less dense side of the filter should be facing the air inlet side) and then insert the cover in its place, verifying the right fixing.
We recommend the use of suitable protective gloves when performing the above.
You can download the full mounting instructions here.


